|
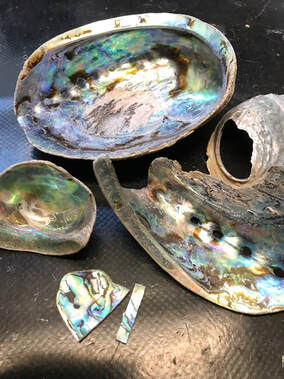
Paua or abalone shell is a beautiful material to use for highlighting eyes or other details in carvings. Picking up empty shells off the beach is OK. Picking live paua off rocks is not. NZ and Australia have strict rules on the harvesting of them, so please be aware and sensitive to the delicate environment we live in!
The colours of paua may fade over time in sunlight, so the strongest colours may be found on the outer, convex side of the “mother of pearl”, under the cream-coloured surface layer of the shell if it has been on the beach for a while. Grind or file it off to find out. Prepare the cavity in the workpiece with an inverted cone-shaped dental burr to produce a flat bottom to the hole and slightly undercut sides which provide a solid key for the insert when glued. In times past, Maori carvers used sealing wax – and there is no reason why you shouldn’t too if you can find some.
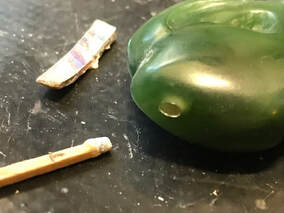
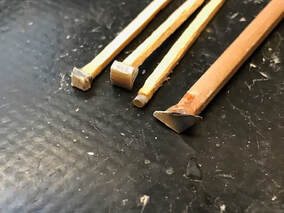
Once you know the size of the cavity you need to fill, you can cut your shell with a very fine toothed razor saw, sand it flat if needs be (not usually needed), glue the surface you want to be seen when finished to a dop stick (made of fine dowelling or a matchstick) with epoxy glue, leave until it is dry/hard and then start to grind it to size. Try not to inhale the dust – it smells like you are at the dentist having a tooth drilled and is not very pleasant, and potentially dangerous if you inhale lots, so if in doubt wear a mask.
Because the inserts drop off every so often during grinding due to the sideways loading on them, you might want to prepare more than you need and see which you use in the end. It also means if one drops on the floor and you lose it you don’t have to start again from scratch.
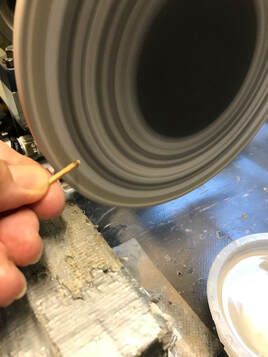
You can grind them on a slowly rotating lap using 600 – 1000 grit paper. Use only very light pressure. And keep the piece cool by regularly dipping it in water because above approximately 80˚C the epoxy breaks down and your small piece of paua is going to go spinning off somewhere. So you should wear glasses to protect your eyes just in case. You can also use fine diamond files for the final grinding to size - or whichever method gives you less sideways pressure to break the glue bond. When it is the correct size, test fit it the right way up and make sure it is not proud of the surface of the piece. Mix your epoxy and fill the hole. If the insert is a little thin, you can use a pad of glue to raise it. Squeeze in the insert and clean up any excess glue. Leave to harden before polishing. If the insert ends up proud of the surface, grind it down with very fine files or Wet & Dry Paper and see if the colour at that level is still satisfactory – it should be. Otherwise, drill it out and start again. The effect is worth it in the end!
0 Comments
Leave a Reply. |
AuthorOn this page I intend to add monthly updates on aspects of jade carving. I also plan to invite more experienced carvers to offer a "master-class" on a particular subject of their choice. With this I hope to enthuse both the novice and the expert in this ancient and beautiful art-form/craft. And comments are welcome! Archives
March 2024
Categories |
 RSS Feed