|
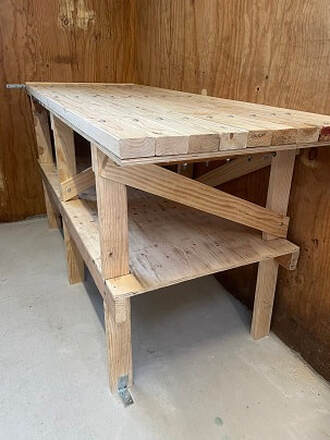
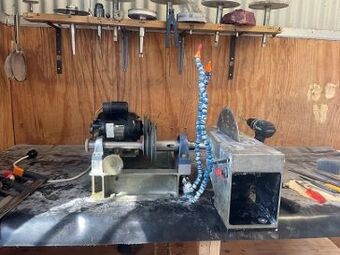
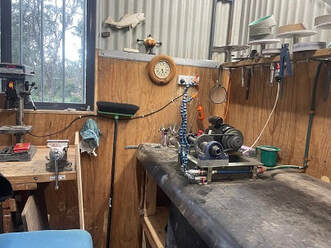
It’s an obvious post to write – how I set up my workshop, given the circumstances. So here goes! This was a big move for my wife & I – after living in a series of houses provided by her previous employer, upon her retirement we moved into our own house. The block had an old, small stable on it which was designated as my workshop and all the useful stuff I couldn’t bring myself to dump, and which couldn’t be stored anywhere else. As an old two-stall stable, the entrance foyer was concreted, but the stalls on either side had a floor of urine- & groundwater-soaked bricks, on which I couldn’t store anything. The place also had a healthy resident possum population which had left its mark everywhere with any form of body excreta you care to think of. Welcome to the country! So I needed to remove the bricks and replace them with poured concrete slabs. We found several well-hidden possum entrances along the way and blocked them up – it was time they found their own nests, out in the wild! The workshop was dark, so I had a window cut into the end where my workbenches were going. After removal of the bricks and the pouring of the slabs, the new floors gradually dried out. Our possum population didn’t like all the noise and left, and after a year of working on the house renovations and much wistful thinking about the design of the workshop, I installed my original “travelling” workbench which used to support all my equipment, and bought the wood and bolts for my larger, new, second bench. Heavy is good because it won’t vibrate much. The design for my new bench was basically the same as my original one, which has stood up to the job for the last 40 years. Bracing is the key here, and also anchoring it securely to the walls and floor so it doesn’t work loose. I also made sure it had a slight fall towards the front so any splashes would run off into the bucket or onto the floor. I wiped a smear of sealant between the lengths of timber in case any leaks allowed water through to below. Once it was built and installed, I laid out a new piece of fibre-reinforced rubber sheet and attached my point carver to the bench using the same spacing as on the old bench, and then carefully measured the clearance for my rests. I almost got it right the first time! I installed my Dremel above the right end of my bench, instead of the left, to counter an annoying tremor which I’ve developed in my left hand in recent years. That’s age for you! After that it was a matter of installing the water line, which as we now have a water pump for the bore header tank, which cuts in whenever the pressure in the block ring-main drops, will be taking quite a load. It will also mean that the pressure of the spray on my laps, belts and blades will vary and I have yet to see how that will work. Maybe I’ll need to add a water bottle high up above the bench and use that instead? I’ve added another pool/industrial carpet section in front of and under the front of the new bench in case of dropped pieces of work and cut it to fit with the old one under my old workbench situated on the end wall in an “L” shape.
Our electrician then added more power points and new LED lighting, and that, basically, is it. Cabling has been tacked to the walls to keep it out of the way, equipment and tools sorted and put in order, and I’m now ready to go! At long last!!
0 Comments
|
AuthorOn this page I intend to add monthly updates on aspects of jade carving. I also plan to invite more experienced carvers to offer a "master-class" on a particular subject of their choice. With this I hope to enthuse both the novice and the expert in this ancient and beautiful art-form/craft. And comments are welcome! Archives
May 2024
Categories |


 RSS Feed