|
The best and easiest way to cut your nephrite is with a diamond circular saw blade, mounted on a heavy mandrel or axle, with a robust locking collar and other safety mechanisms. Sounds simple doesn’t it? But the design and production of these blades is a science in itself and you need to understand a little of this before you go out there and buy your equipment. Technically these blades don’t cut the stone – they grind it away – there aren’t any teeth on the blade, just small diamonds set in a bond, or matrix, of a particular hardness such as sintered bronze or a steel alloy. You will find it hard to cut your finger on a smooth rotating blade but you can grind your finger nail away – so be careful! The diamonds and bond encircle a plain disk of steel (the blade body). This body is thinner than the diamond-set outer edge to allow cooling water to percolate around it as well as to reduce friction with the rock – so you don’t need as powerful a motor as you otherwise would. Diamond blades are graded by speed of cut and the durability of the blade – generally you can have one, but not the other as they are pretty-much mutually exclusive! Factors which determine this include diamond size and quality, the concentration of diamonds, the width of the cutting edge and the hardness of the bond. These are mostly too technical to discuss here. But price comes into the equation as always – a more expensive blade will either last longer, or cut faster than a cheaper blade. If in doubt, talk with your blade supplier – they certainly know more than I do about the technicalities! But nephrite is a tough mineral to cut so go for one of the harder grades of blade. The safety equipment you need is a set of ear protectors, and a good pair of goggles to protect your eyes from chips & splashes. I don’t wear protective gloves, or know anyone who does, but a waterproof coat is really useful if you don't live in the Tropics! The points discussed below are:
And I end with:
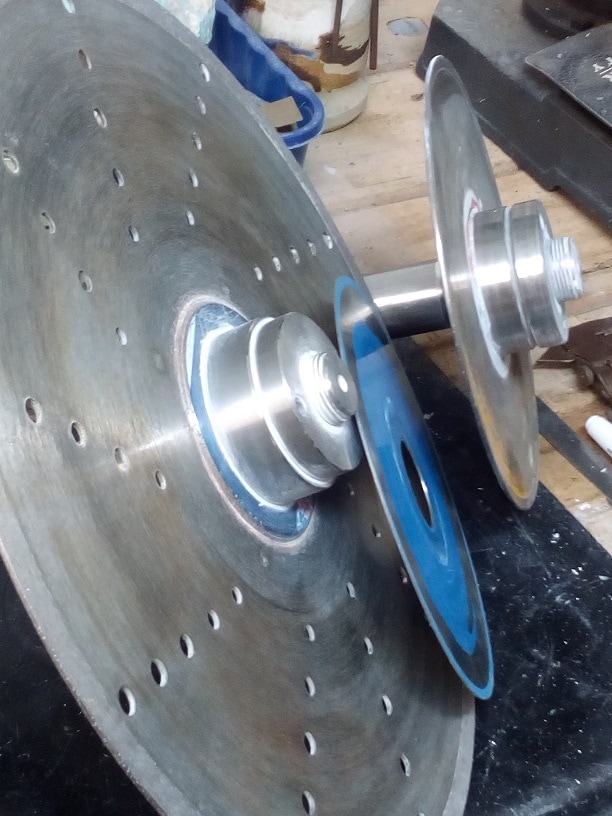
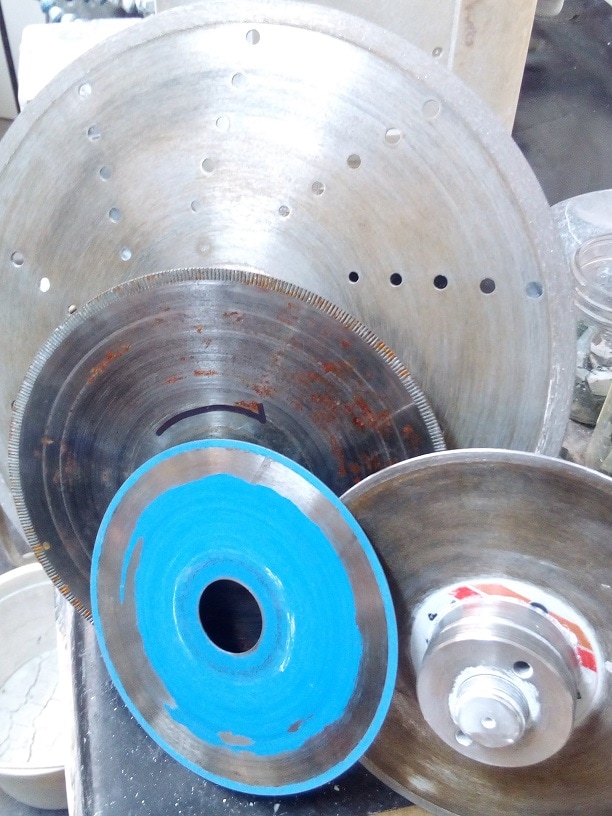
Dry, water- and oil-cooled blades: I’m mainly going to consider the water-cooled blades – dry blades heat up too much with thick cuts and would damage the stone, causing small white flecks to appear in the overheated stone near to the cut. Oil-cooling (using machine oil) needs more effort to contain the coolant, is messier and I have no experience of it with diamond blades, though it provides better lubrication and less friction so it would run cooler than with plain water. You need to cool the blade on both sides as it cuts, from as close to the centre of the blade as you can get. This stops warping of your precious blade and keeps the stone cool. Warping and overheating of the blade, caused by poor cooling on one side, will cause the diamonds & bond to wear away on the dry side. And of course, water prevents dust - what does form instead is a thin slurry called rock flour – it is microscopic pieces of your nephrite which have broken down to a clay in the cutting process. Blade sizes: I would love to have a large saw to take a 900 – 1000 mm blade but whilst I’m moving around the world it is too bulky to even think of. So I make-do with 2 - 300 mm blades which are 2.0 - 2.5 mm wide for cutting and slabbing rocks (see the set-up in the March 2017 blog, Picture 5) and a number of much thinner 150 – 180 mm trim saw blades. These latter are used to cut off edges and other pieces of rock to minimise the amount of grinding needed, which speeds up the carving process - and I end up with plenty of small pieces to make earrings from afterwards! The MK Diamond Products website gives some interesting information on the factors affecting rock cutting speed and blade life, as well as relevant recommended speeds for their blades which can be used as a general rule: Diameter mm Recommended rpm Maximum rpm 150 6000 10,000 300 3000 5000 500 1800 3000 900 1000 1450 As you see from the table above, the larger blades are used at lower rpm because the rim speed is much faster at a particular rpm than the smaller ones – if you over-speed, the blade will disintegrate at some point – not a pretty sight I’m sure! Just be really careful when you are trimming pieces off your work as the potential to lift the rock off the rest, twist it slightly, trap the blade and buckle it is very real. And then you risk two possible outcomes – the rock you are cutting is wrenched out of your hands and thrown with a lot of force in an unpredictable direction, or it jams and your motor instantly begins to overheat. Either way, it is a risky situation and should be avoided at all costs. Blade types: blades fall into one of the following categories (see Picture 1 above):
There is a lot of useful information on the KMS Tools website “Diamond blades – Blade guide 101” if you are interested.
General: below are some other points you might like to consider.
How to cut a piece of stone: following is a run-through of the procedure. Set up your equipment, put on your protective clothing and make sure the cooling water is flowing equally on both sides of your blade. Make sure your chosen stone is securely clamped if the blade approaches it, or is arranged in a stable manner if you move the stone to the blade (I’ll assume this latter method in my comments below). Put on your eye & ear protection. Turn on the motor. Ease the rock forward very slowly to meet the blade. The first contact of the blade and rock tends to “jar” a bit, but continue to apply gentle pressure to the rock to continue the cutting process. If you have a “guide” on your machine, you only have to press the rock forward and slightly inwards towards the guide to keep the cut straight. With no guide you need to ease it forward and make sure you are keeping the cut straight. Frankly, it is worth having a guide so you can cut parallel slabs every time – wedges mean wasted stone and a lot more grinding. If you press too hard on the stone you will hear the speed of the motor start to slow and it would eventually stall – causing the motor to overheat – so be aware of the pressure you are exerting on the rock. But as the blade cuts into the thicker, middle, part of the stone the motor will slow anyway, so press less heavily to keep the blade speed up. Keep an eye on the amount of spray coming from the cut – it has happened to me that the water pressure dropped mid-cut and I had a rapidly warming rock, and dust everywhere instead of spray! Keep pressing lightly and watch your progress. No two pieces of stone are the same – you will find some cut more quickly than others. Some cut irregularly due to the natural banding in the stone. Whilst cutting, a fracture may open up – be aware and act accordingly – if a piece sloughs off, make sure it can’t slip into the blade guide in the rest and cause it to jam. Small chips can fly off in all directions, so be aware and don’t flinch, or worse, let go of the rock! Whatever you do, don’t let go of the rock you are cutting – anything can happen - and all the options are bad! If you need to withdraw the rock half-way through a cut, do it very, very carefully – it is better to take the rock off a moving blade than risk jamming the blade in the rock once you have stopped the motor. But don’t force it. As you near the end of the cut the blade speed will increase as the thickness of stone being cut decreases. The rock will inevitably break with a couple of mm to go – so complete the cut by continuing to push forward and remove the little barb of stone. When the cut is done, remove the stone, stop the motor, stop the water flow, clear away the chips, and look at what you have cut – it is always an exciting time! And then repeat the process again and again, bearing in mind your sludge bucket will need to be emptied at some point! Happy cutting!
0 Comments
|
AuthorOn this page I intend to add monthly updates on aspects of jade carving. I also plan to invite more experienced carvers to offer a "master-class" on a particular subject of their choice. With this I hope to enthuse both the novice and the expert in this ancient and beautiful art-form/craft. And comments are welcome! Archives
March 2024
Categories |


 RSS Feed