|
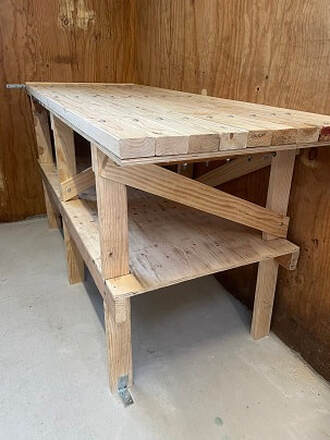
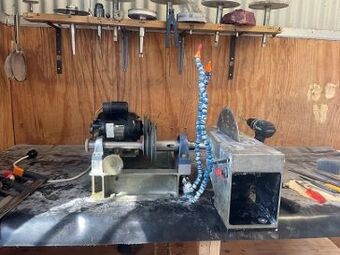
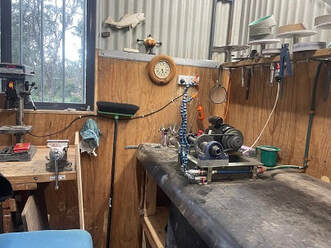
It’s an obvious post to write – how I set up my workshop, given the circumstances. So here goes! This was a big move for my wife & I – after living in a series of houses provided by her previous employer, upon her retirement we moved into our own house. The block had an old, small stable on it which was designated as my workshop and all the useful stuff I couldn’t bring myself to dump, and which couldn’t be stored anywhere else. As an old two-stall stable, the entrance foyer was concreted, but the stalls on either side had a floor of urine- & groundwater-soaked bricks, on which I couldn’t store anything. The place also had a healthy resident possum population which had left its mark everywhere with any form of body excreta you care to think of. Welcome to the country! So I needed to remove the bricks and replace them with poured concrete slabs. We found several well-hidden possum entrances along the way and blocked them up – it was time they found their own nests, out in the wild! The workshop was dark, so I had a window cut into the end where my workbenches were going. After removal of the bricks and the pouring of the slabs, the new floors gradually dried out. Our possum population didn’t like all the noise and left, and after a year of working on the house renovations and much wistful thinking about the design of the workshop, I installed my original “travelling” workbench which used to support all my equipment, and bought the wood and bolts for my larger, new, second bench. Heavy is good because it won’t vibrate much. The design for my new bench was basically the same as my original one, which has stood up to the job for the last 40 years. Bracing is the key here, and also anchoring it securely to the walls and floor so it doesn’t work loose. I also made sure it had a slight fall towards the front so any splashes would run off into the bucket or onto the floor. I wiped a smear of sealant between the lengths of timber in case any leaks allowed water through to below. Once it was built and installed, I laid out a new piece of fibre-reinforced rubber sheet and attached my point carver to the bench using the same spacing as on the old bench, and then carefully measured the clearance for my rests. I almost got it right the first time! I installed my Dremel above the right end of my bench, instead of the left, to counter an annoying tremor which I’ve developed in my left hand in recent years. That’s age for you! After that it was a matter of installing the water line, which as we now have a water pump for the bore header tank, which cuts in whenever the pressure in the block ring-main drops, will be taking quite a load. It will also mean that the pressure of the spray on my laps, belts and blades will vary and I have yet to see how that will work. Maybe I’ll need to add a water bottle high up above the bench and use that instead? I’ve added another pool/industrial carpet section in front of and under the front of the new bench in case of dropped pieces of work and cut it to fit with the old one under my old workbench situated on the end wall in an “L” shape.
Our electrician then added more power points and new LED lighting, and that, basically, is it. Cabling has been tacked to the walls to keep it out of the way, equipment and tools sorted and put in order, and I’m now ready to go! At long last!!
0 Comments
Just before I packed up my workshop back in mid-2022 I’d been using my laps a lot and made some notes on several things I’d noticed at that time:
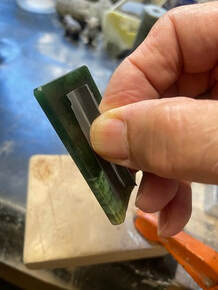 Figure 2 - a small piece of duct tape attached to the back of a thin piece of Marsden. Normally I'd be grinding away my fingernails on the flats
It's good to be back! Happy carving!
Some six months ago I thought I'd be back up and carving again in two.
Either my memory is going, or I'm slower than I used to be! Happy to say though that my workshop is now set-up, and I'm only waiting on the electrician to come and upgrade the lighting and install more power-points. Oh, and to get a few more things done out on the block, like assemble the raised beds and install them, along with the watering system. So thank you for your patience - I'll be back in a few weeks, and already have a couple of monthly updates planned. Happy carving! Hi Everyone,
Sorry for the extended period of inactivity on the website, caused by packing up, renovating my new place, moving, and more renovating! The good news is that the stables, which will become my new workshop, have had the leaks in the roof sealed, a new concrete floor poured, the possums have been pushed out and I'm starting to sort myself out in there. But it will be a couple more months as renovations on the house continue, as well as trying to get the block into some sort of shape. Rest assured I'm absolutely DYING to get back to carving!!! And as soon as I have anything to show I'll post it. In the meantime, thank you for your kind messages - they are really appreciated. So happy carving and I look forward to talking soon!! As promised, when I get a moment to add items I will.
I am still working on a large piece which I hope to enter into an exhibition at the end of the month and over the last couple of days the tone of my point carver changed. Its tone became irregular and louder. New noises on a piece of equipment are not good! I checked the temperature of the bearings and bushes - normal. Just to be on the safe side I oiled the bushes and greased the bearings anyway, and waxed and re-tensioned the belt, but it still made the same louder and pulsating noise. I checked all the nuts and they were tight. Then I tried the grub screws in the stepped pulleys. One was loose! I applied Loctite and tightened it, and instantly, the old hum returned! So please take note of the noise of your equipment - it is telling you when something is wrong! This is a busy year for my wife and I as she approaches retirement, we try to make-up time lost to travelling as the result of COVID, we prepare to move into our house near Canberra which entails quite a lot of toing-and-froing to meet with overworked tradies to help upgrade the place, and we have the actual pack-up, move and unpack which will keep us busy for months as we embrace a new chapter in our lives. It's all very exciting!!
What I'm trying to say is that due to spending less time than usual in my workshop, from where I garner ideas for my monthly carving tips, I'm reluctantly letting you know that I'll be less regular on this blog for the rest of this year. But I'll continue to answer your emails, and if a suitable query comes in I'll answer it here. In the meantime, I hope you stay healthy and enjoy life as best you can in these still-strange times. Thanks for your past support and ... happy carving! A couple of short points for you this month -
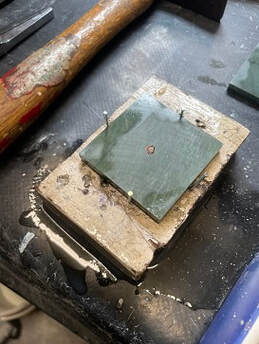
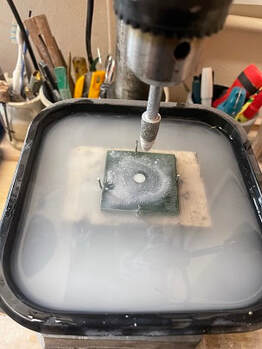
1. I was grinding a thin piece of stone recently and applied it to a previously-used sheet of 600 grit Wet & Dry (W&D) on my lap. The stone was whipped out of my fingers and bounced harmlessly off the back of the splash box, happily. The next time I tried it gave me the same result. I stopped the lap and checked the W&D and found it to be more worn than I had thought. Being flat, the stone was being dragged out of my fingers by osmotic attraction between W&D and stone. By replacing the W&D I finally got to grind it down. 2. A few days later there was a lot of squealing when I started the motor. I added my usual wax to the inside of the belt with no reduction in squeal, so I checked the belt tension and found it to be a bit loose. The tension needs to be “just right”: too tight and you eventually wreck the motor bearings/bushes; too loose and you get excessive belt wear because of the slipping/squealing. The moral of the stories is: you need to keep on top of these matters with your equipment. Happy carving! Large, deep holes can take a long time to grind out if you start with the finest burrs and gradually work up in size. But here is a situation where I saved myself lots of time, by using a large, coarse burr, set in my drill-press, where I could apply more pressure to the work. Pointers:
When I assemble the eight pieces of stone I’ll use a piece of threaded brass with nuts attached to hold them all together. To help them hold, I ground out the top and bottom holes with a keystone shape to make sure everything will stay together once it’s assembled. Now all I need to do is make the time to complete the piece!
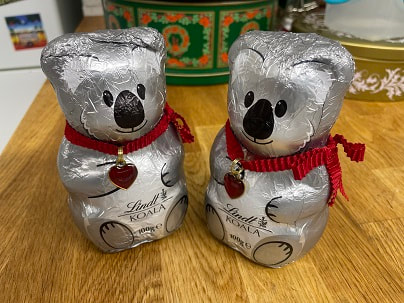
Happy carving! And if you thought I only like Cowell koalas, here are a couple of very tasty young fellows from Lindt!
Enjoy!! Phew, just made it this month! Warning: this month’s blog is about NOT carving. Shock, horror! Has Nigel lost his marbles? Well, maybe.
Life isn’t always quiet and ordered, and this last month has been a particularly busy one for a variety of reasons – though I’d stress for all the right ones. So, no, I haven’t caught one of the many variants of COVID (and I hope you haven’t either as it can be a really nasty illness) and I haven’t abandoned my workshop. I just haven’t had time to do as much carving as I’d like to, and there hasn’t been much worth capturing in pictures or words to pass on to you. Life happens! So, do I become frustrated when not carving? Yes, a little. And how do I manage that? I figure a happy and meaningful life is about making the right decisions. So, below is a list of how I weigh the various factors in my life, starting with the most important people or activities and going to the less important further down:
Life is about priorities. You have to decide what your own are, but at different times in your life some activities will rise in importance and fall again later. To quote the old proverb, “All work and no play makes Jack a dull boy”, so hopefully you can spread your time over several activities each day? But for the last few weeks I’ve rarely been relaxing in the workshop, sadly. Even when not there I often think about the pieces I’m carving, and about the pieces I’m going to carve. Sometimes I dream about them. I have a book stuffed with ideas on loose pieces of paper scrawled during my travels or occasionally on the pages themselves. Most will not see the light of day, but others are just awaiting that special piece of stone or opportunity. So all is not lost and I hope to have something to show you next month. Until then, stay calm and healthy, and I wish you happy carving! |
AuthorOn this page I intend to add monthly updates on aspects of jade carving. I also plan to invite more experienced carvers to offer a "master-class" on a particular subject of their choice. With this I hope to enthuse both the novice and the expert in this ancient and beautiful art-form/craft. And comments are welcome! Archives
March 2024
Categories |
 RSS Feed