|
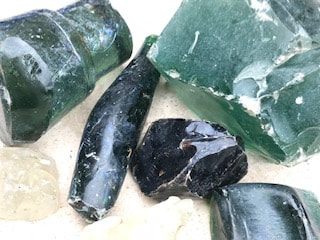
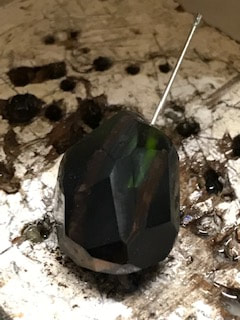
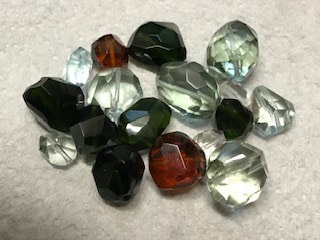
In 2007 I picked up some lumps of glass from the Matola City garbage dump for Maputo in Mozambique. They were colourless, green and brown, and seemed, from the colours and shapes, to be the ends of glass pours for bottles at the local Coke factory and brewery.
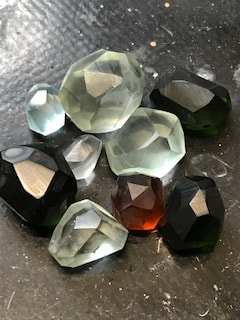
Picking it up is a story in itself. I was wandering around the bottom of the pit with an armful of lumps looking for “just one more piece” when I noticed my wife, standing near the car at the top of the slope, waving frantically at me … and then noticed a few men standing near her, wearing military fatigues, also waving, seemingly indicating I should head towards them with some urgency. This I did, rather grudgingly, I mean what could be the hurry? As I reached the bottom of the slope there was a large explosion behind me. I’d been only metres away from a pile of recently cleared landmines ready to be blown up. It’s wonderful what life throws up! Some years later I cut up some of the blocks and ground them into small spheres to be facetted and turned into beads. They then sat in a dish on my bench through at least two postings, until recently when I made the time to finish them. What I wanted was to make some irregular, free faceted beads in the form of polyhedra (solid, multi-faced figures) with nice, regular triangular or occasionally polygonal faces, all about the same size and with a reasonable angle between the faces. What could be difficult about that? Well, it started off easily, as I first used 120 grit Wet & Dry (W&D) paper on my lap with water to cool everything and prevent dust from coming off, with only the occasional loss of part of a fingernail. At the end of the grind I put a dot with a permanent marker on each facet and started to grind them with the 240 grit paper. I did this because when wet it was impossible to tell if the face had been ground or not. I went on to the 600 grit. No problems.
But when I went to 1000 grit paper, I noticed it was becoming increasingly difficult to grind the facets flat, and found it was really easy to come away with curved surfaces with irregular hinge lines between two faces, or else as I pressed the bead against the paper I couldn’t place it flat and would end up with another smaller face at a really shallow angle to the others. This happened especially when the W&D was worn. I tried using 800 W&D paper as a compromise but I had the same problem. One way around this problem was to change the paper earlier to avoid it becoming too worn. Of course, at every new face and every correction the beads became smaller with some down to the size of a large pea.
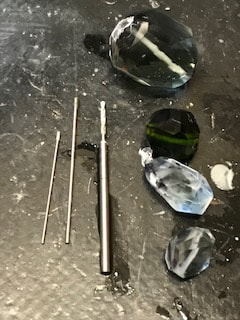
I eventually managed to produce a reasonable set of facets and a good finish on the beads with 1000 grit paper. Then I had to drill the holes. I had three options available to me:
I started with the method 2 above, and they were wonderful! They were long and rigid and drilled the glass quickly. But after only a few holes the end of one twisted off and I had a lot of fun in drilling the other part of the hole to be able to push out the tip. A few holes later and a second one lost a diamond and ruined the tip. So that ended my efforts with method 2. I tried using the diamond-tipped drills, method 3, but they were very flexible, and couldn’t be steered in the glass and I couldn’t rotate them to widen the hole.
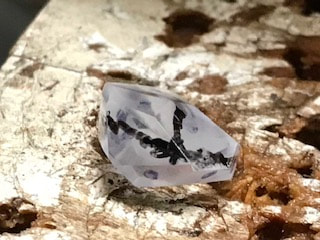
So I went back to the tried-and-trusted method number 1! I quickly realised I needed to drill almost all the way through from one side and only then drill in from the other end so as to avoid misdirected holes not meeting. This was because the refracted images of the hole made it difficult to tell where it was heading, so with the one deep hole, it was easy to put a spare drill in the hole and use a permanent marker to draw the line of the hole around to the other end with two or more “segment” lines, and where they intersected I started to drill the second hole.
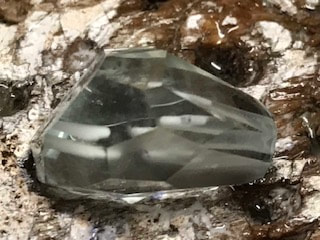
This was successful, and I had no problems joining up the two holes. Where the bead was too large for the dental burrs to reach, I used the diamond-tipped drills to extend them and to join in the middle. Any slight misalignment of the holes was corrected when I cleaned out and enlarged the holes afterwards.
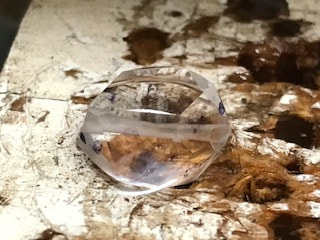
And so to the polishing: I used my hard felt disk with 14 k diamond grit and the faces came up beautifully with a minimum of effort. A few faces showed failures in my technique that were not apparent before. These will be reground with 1000 W&D and then re-polished the next time I have the right equipment out. So will I go through this process again? If I need a particular shape and size of bead, yes, but as a general rule, the time and consumables I used to make the batch were far in excess of the value of the beads I produced. It was an interesting exercise though.
0 Comments
|
AuthorOn this page I intend to add monthly updates on aspects of jade carving. I also plan to invite more experienced carvers to offer a "master-class" on a particular subject of their choice. With this I hope to enthuse both the novice and the expert in this ancient and beautiful art-form/craft. And comments are welcome! Archives
March 2024
Categories |

 RSS Feed