|
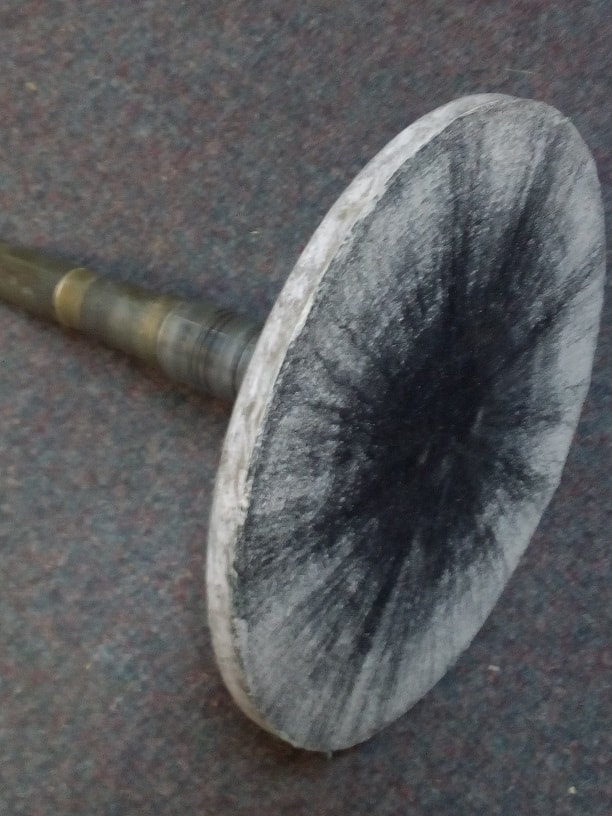
Laps are the most basic piece of carving equipment after sand and water! They are ideally made of a 5 - 10 mm thick disc of steel machined perfectly flat, and 150 – 250 mm diameter. They need to be rigid and heavy so there is a flywheel effect and they don’t slow down easily as you apply pressure. They can be mounted on a Morse taper to insert into your point carver or have a suitable diameter plain shaft which can be gripped in a chuck. A screw-in mandrel isn’t really suitable – the disc is too heavy and it needs to be completely “true” so there is no wobbling which would affect your work and wreck your wrists! I have glued a 2 mm thick disc of sheet rubber onto the steel with contact adhesive to protect the latter from wear, and then used 3M Spray Mount to temporarily fix discs of Wet & Dry paper (W&D) to the face (it’s a lovely product but hard to source outside NZ and the USA. In Australia you can purchase a product called "3M 75" which is, I'm told by 3M, basically the same, though I have yet to use it). To attach the W&D, I take a sheet, apply it to the rubber and cut around the edge with an old pair of scissors. Be careful to cut it close to the steel disc because spinning W&D can give you quite a nasty paper cut if you aren’t careful. I save the larger offcuts for small jobs around the workshop. Start with 100 grit paper and gradually go up through the grades – 220, (400,) 600 and 1000 as detailed before. It makes life easier if you have a number of laps – one for each grit size – and saves slightly-used sheets for the next job, so saving you money. Be careful you don’t press too hard on the lap because the rubber “gives” a little and you will end up with slightly rounded edges instead of sharp ones - and you wear out the paper more quickly. As the sheets wear they cut more slowly. You will know when it is time to change them! Safety note: do not lead in with a sharp point or edge against the direction of travel of the lap – it can catch, dig-in to the W&D and be torn out of your hand - and rocks flying around my head are not my favourite things! It also means you can’t use that sheet of W&D any more. I use my laps at around 1750 rpm for best effect. But don’t forget you need a dribble of water, applied to the centre of the lap by your Loc-Line or equivalent (see Picture 1 from the splash boxes blog). You can see how it sprays outwards in the picture, keeping the whole of the working face clean and moist – and you as well if you apply too much water! The water also keeps the stone cool so you don’t burn your fingers. So what can you produce using the lap? Let’s start with flat surfaces, and shapes made up of those. They’re OK to start with. But you can also form cylindrical shapes (ie curved along one axis), and can go on to make convex-shaped pieces (ie cabochons – “cabs”) and surfaces with a bit of practice. So they are very versatile. And with experience you can turn out some beautiful curves. Always check your work with a hand-lens to see there are no ridges or tool-marks and, as previously mentioned, grind twice at each grade, at right-angles to the previous operation to make sure you have ground off all the coarser scratches before progressing to a finer grade. A few tips:
So there you have it – Laps 101! Enjoy!
0 Comments
Leave a Reply. |
AuthorOn this page I intend to add monthly updates on aspects of jade carving. I also plan to invite more experienced carvers to offer a "master-class" on a particular subject of their choice. With this I hope to enthuse both the novice and the expert in this ancient and beautiful art-form/craft. And comments are welcome! Archives
May 2024
Categories |

 RSS Feed