|
Just a quick item this month as I’m sure you all have plenty to do without spending too much time reading this, even with the COVID lockdowns in many parts of the world.
The question is: is it the best work you can do? Can you improve on the piece you have in your hand? You need to look from the whole piece to the tiniest aspect of it. And if yes (and you always can), how?
Why do I raise this question? Because if it’s not your best possible work then it’s second-rate. We all need to strive for perfection! Mind you, it’s often only you who can see the shortcomings! Maybe you had to modify the design early-on because of a slip with a tool or there was a fracture in the rock which became apparent only once you started grinding? In the production process, irregularities in the stone or just slight differences in the time spent grinding can cause curves which should be mirror images of each other to have different radii. They affect the harmony of the piece. Maybe you’re okay with that, maybe not. If not, act! These things happen to everybody. So it’s about how well you disguise or clean them up that marks the expert carver! So you think you have almost finished a piece? And bear in mind that many of the minor problems only become apparent as the piece nears completion. Life’s hard like that! Pick it up and roll it around in your hand. Really look at it! At the one time you need to be looking at the macroscopic aspects of the piece with your eyes/glasses, and also the microscopic aspects with your loupe/hand-lens. I gain much satisfaction from handling a piece at this stage and from cleaning it up and improving it. It might take 10 minutes or an hour, but at the end it will be better. The merging of two curves can be beautiful or it can look harsh. The relationship between a number of faces is important. So set-to if the piece doesn’t look right! Generally, you have the scope to grind things back a little to achieve this. So here’s to perfection! Keep on carving!! And keep safe in these uncertain times.
0 Comments
As soon as SA reopened its border to NSW a few weeks ago I asked my wife if she was interested in a trip to Cowell to visit the yard belonging to Cowell Jade* as I needed to purchase some more nephrite for some pieces of work I have planned for the future (watch this space!). Happily she jumped at the idea! So that is my excuse as to why I didn’t do more carving this last month! The countryside from Cobar to Broken Hill was as green as I’ve ever seen it due to recent heavy rains. And it was wonderful to be away from the city! By the time we reached Cowell it was raining, but after the heart breaking drought of recent times (still ongoing in parts of WA), I’m not going to begrudge anyone a bit of rain.
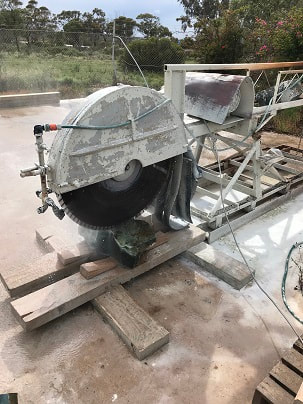
In Cowell I met Peter, the yard manager, & Niel, who acts as a consultant (he’s been involved with the exploration for and production of jade there since it was discovered by his uncle, Harry Schiller, in 1965), and we had good conversations on all sorts of rock-related subjects! We looked around the yard and selected several suitable-looking pieces of stone to cut to see what they were like inside, and from these, I selected a few pieces to bring home. I also learnt a lot more about the lease and stone in general – the two are a mine of information if you’ll excuse the pun and I really appreciate the time they gave me – thanks to them both.
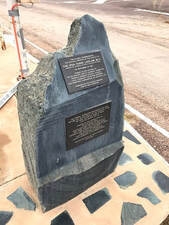
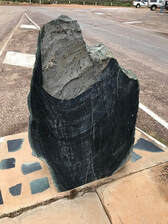
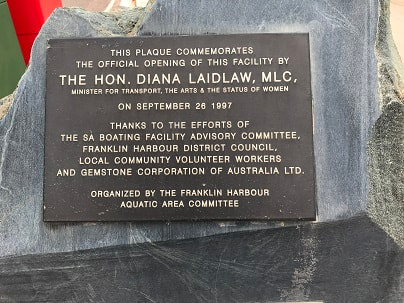
Whilst there my wife & I went looking for oysters and fresh seafood, and were told about a great place, past the Franklin Harbour Hotel, near the boom gates in the car park at the end of Main Street. Whilst we were there I couldn’t fail to notice a large block of interesting-looking stone with a couple of plaques mounted on it. It certainly looked like nephrite! And then I saw the name of Gemstone Corporation – yes, it was!
A few days later we left with the car just a bit heavier than when it arrived. I’m looking forward for a good excuse to use it - oh bliss!
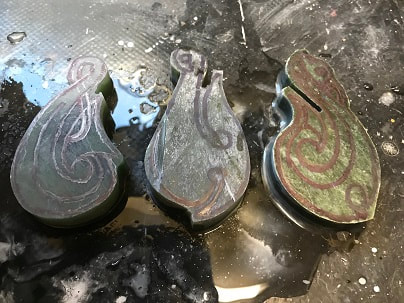
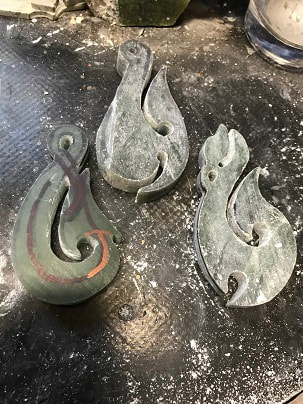
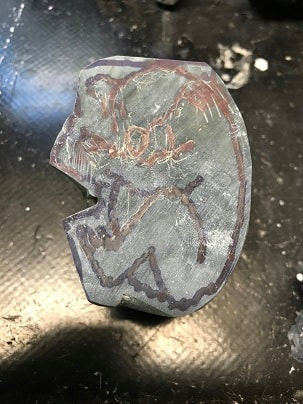
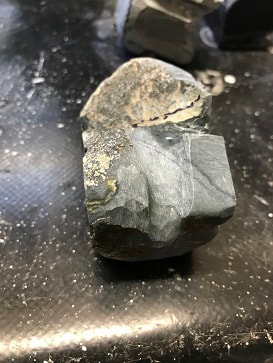
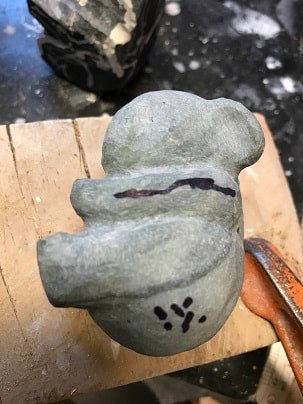
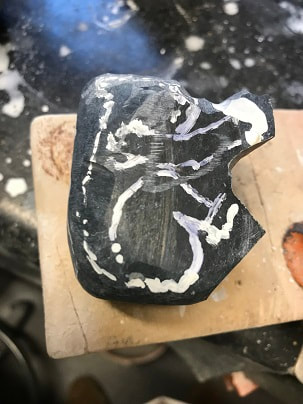
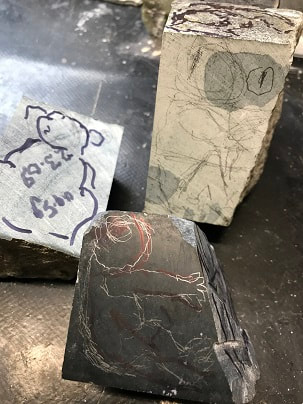
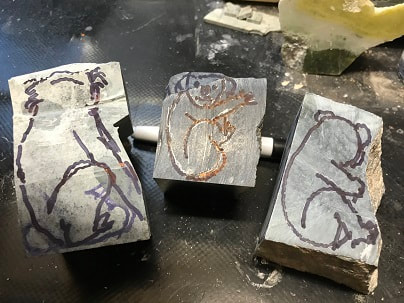
* Please note, access is by arrangement only It’s been a while since I carved any Maori-inspired pieces, so I produced three designs I liked, headed to the stock box and pulled out three pieces to slab for them. I deliberately cut the slabs thickly (around 10 mm) because I wanted them to be masculine and “chunky”. Mark the outline in marker pen on one face of the slab and trim-off as much as you can - it is precious. Then grind off the remainder to get the pieces to approximate size and shape.
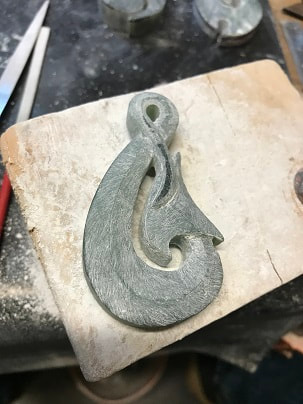
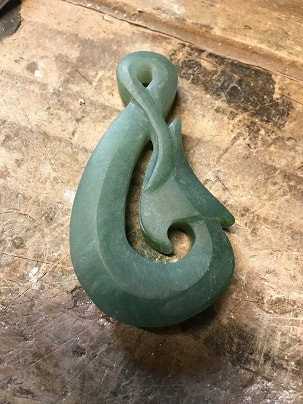
I’ll concentrate on the lefthand piece above since the techniques are the same for all:
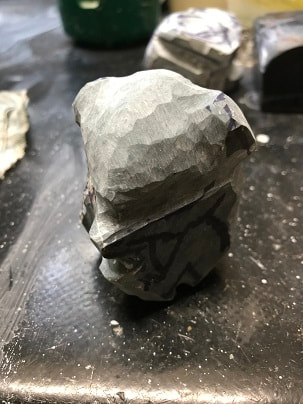
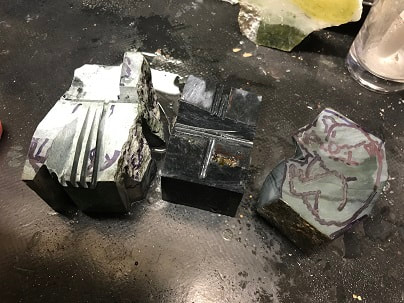
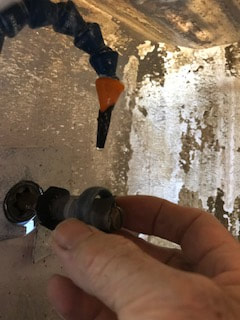
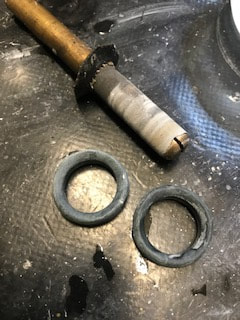
Whilst this was happening I had some problems with my equipment and needed to spend time replacing my Dremel flexible extension drive. I also oiled/greased various pieces of equipment and replaced a splash guard on one of my splash boxes – do not skimp on maintenance or it will come back to haunt you. Having got everything working properly again, I continued with the carving:
In these difficult COVID-19 times I find it exceedingly therapeutic to lose myself in carving and recommend it to anyone. So over to you and good luck!
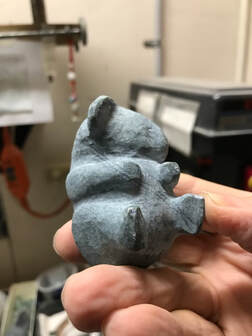
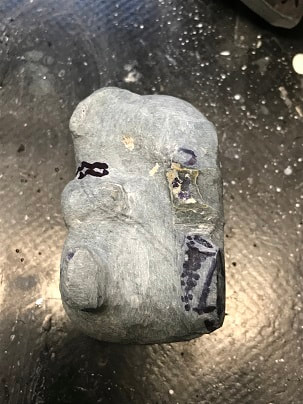
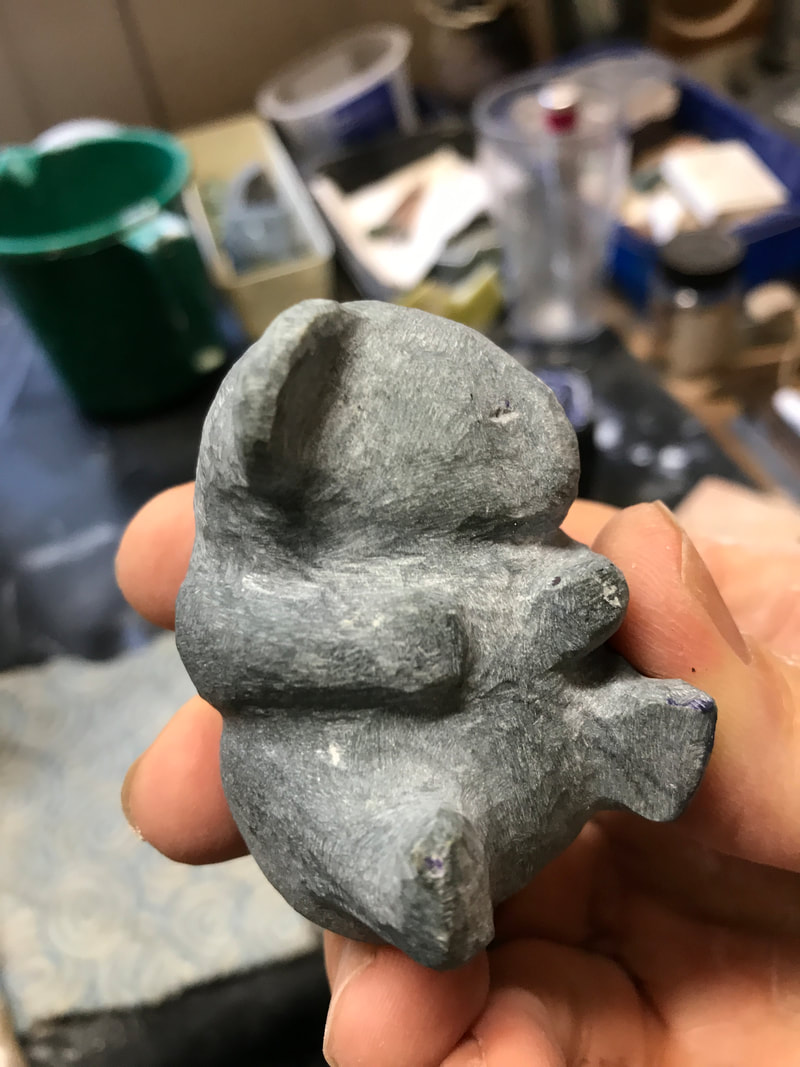
This will be brief because it’s becoming hard to tell you anything you don’t already know about animal carving! Following last month’s entry I decided to keep the koalas slightly rough and unpolished. This harks back to my “protest squirrel” mentioned elsewhere - whilst polishing shows off the quality of the stone and the abilities of the carver, I’m not one for glossy animals generally.
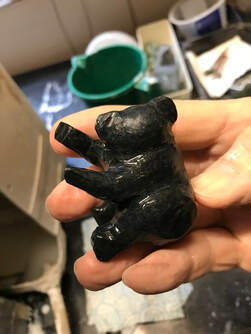
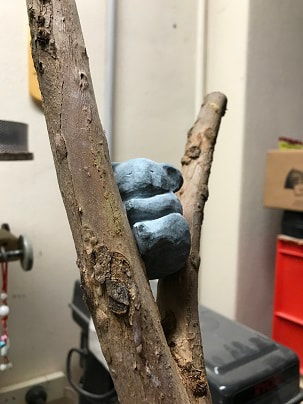
I ground off a few minor high points and rough patches on the first koala, found a few areas that needed some more attention and then ran the burr across the piece, leaving slight scratches in the direction the fur would have laid naturally. I made a final check that it was stable in its “tree” and adjusted the angle of the feet a little. I then attacked the block of stone (much harder than the first because it was completely recrystallized) to make the second koala, a very different design of a more mature animal (hence a smaller head in relation to the body size) and made sure it fitted in its tree one last time.
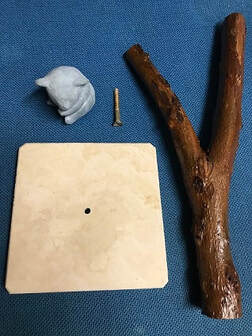
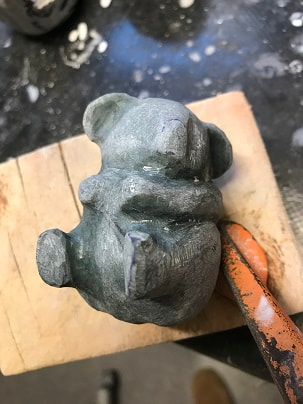
I then turned my attention to varnishing the pieces of wood and found it is difficult to find matt varnish these days. A pity – I’d have preferred to have finished them matt rather than with satin varnish. Oh well, you can’t have it all. I drilled a hole in the centre of the bottom of the wood to hang them upside-down whilst varnishing. And then it was time to consider the base: I’ve been carrying some offcuts of terrazzo floor tiles around since picking them out of a builder’s skip in Dublin more than ten years ago – I knew they’d be useful one day! The stone is very suitable for bases as it is squared-off and has a polished upper face. I rigged up my large blade and cut them as far as I could, but I didn’t have the side clearance in the splash box to cut the slab through completely, and was a little perplexed at what to do, until I thought, “Calcium carbonate is softer than steel!” So I used my hacksaw to finish off the cuts. Perfect! Next, I ground the three bases square on a coarse lap. I filed the bevels rather than grinding them on the lap – it is much easier to get the angle and regularity by hand for me than on a machine. It can look really shabby if the bevel is irregular and spoils the impression of a piece of work. I “drilled” out a central hole in each base using a range of burrs, cleaned them up and let the terrazzo dry before gluing on a piece of felt to each so the stone doesn’t scratch whatever it's placed on. It’s easier to glue on an oversized piece and then trim it afterwards than glue on a piece cut to size.
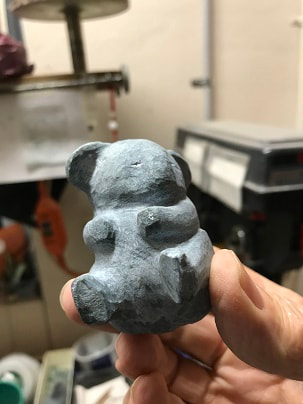
And with that, the first two koalas were finished, ready for dispatch to their future homes. I’m happy with the way they came together. I’ll complete the third, and almost certainly a fourth, in a little while – I’m “all koala’d out” at the moment and want to make some matau’s for a change!
So happy carving to you all! I’m continuing with the koala story this month. They are taking quite a time and I’ve not moved on as far as I’d have liked to with them. But quality over quantity every time!
As I grind down the blocks of stone the shapes of the koalas slowly emerge, which is a strange and wonderful experience. It almost seems as if they are escaping from the confines of the stone!
Points to guide you which come to mind are:
By the next blog I will have done a lot more work on them, including making a decision on whether to finish them polished, or not. Happy carving!
When carving an animal (or another piece which has a very irregular shape) I take the following steps:
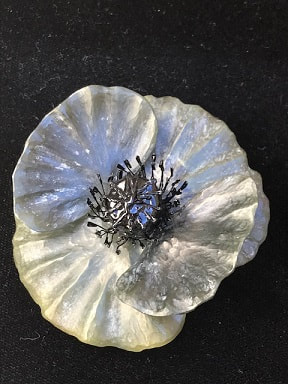
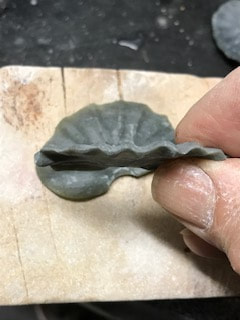
And at some point I reach the moment where trimming is complete and it is time to pull out my grinding wheel to continue to rough out the shape of the animal. And a point on safety: when cutting stone, as you mop up or clean your workspace, be careful not to squeeze the cloth or sponge too tightly as you will have picked up many small shards of stone. You can easily end up with them sticking in your hand. Please be careful! In an earlier blog I wrote about using waterstone grinding sticks to shape my pieces of work. In that article I wrote about using them wet, and creating a slurry. This helps to grind down both the stone and the stick and creates smooth compound- and transition-curves in the least possible time. But on a recent workpiece, a remembrance poppy, I needed to highlight only the raised detail of the faces and wanted to leave the concave areas unpolished, though not rough.
So, once the petals were formed by using first a large grinding wheel, then a small one, I used small sticks (~3 mm square) to gently grind down the whole piece at 600, 1000 and then used a large stick of 8000 on the raised areas. This left the depressions with a silvery-white satiny patina in the concave areas, and the ridges with a semi-polished finish. Perfect!
So always be on the lookout for how to produce a different finish, or using your tools in a different way – it can pay dividends!
There are additional pictures of the poppy in the Recent Work section. This month I’m urging you to try cutting and grinding your pieces thinly. Why? Because then you see the beauty of the form and, if using translucent material, you also see the inner beauty of the stone as well.
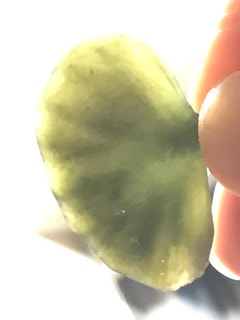
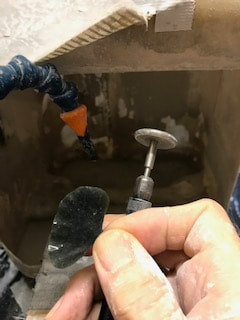
I only tried this because I was asked to carve a remembrance poppy. It’s what I love about commissions – they take me in directions I probably wouldn’t otherwise try! I thought about the form of the poppy for a while, looked at many pictures of the flowers (I try to base my work on a particular example where applicable), saw that the Remembrance Day poppies made out of paper and plastic are an over-simplification of the flower and knew I could improve on them by making each of the petals from a different piece of highly translucent nephrite, Cowell in this case, and fitting them together in a wooden centre, or stock. You’ll see in the picture below I chose to carve a young flower, where the delicate petals are somewhat corrugated and still opening and smoothing out. It seemed fitting in the context. After slabbing the stone and trimming it to size and shape I used my 75 mm diameter coarse wheel to begin to thin the stone.
Following this I used a smaller and finer 20 mm wheel in my Dremel to grind out the ridges on both sides. It meant lots of looking through the stone to check I was grinding in the right places but worked a treat. If carved carefully you hardly see the ridges in transmitted light.
The more-or-less finished petal is shown in side-profile in the picture below. The petal is about 1 mm thick and combines the beauty of the stone in both reflected and transmitted light.
And before I finish, I should add that Chinese carvers have been producing pieces to show off the inner beauty of the stone in just this fashion for thousands of years. So it’s not new, except to me! My next plan is to combine this new-found carving "freedom" in a Maori carving context. Hmm, now to think of a suitable design?!
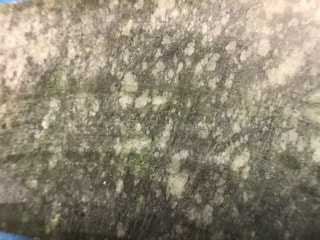
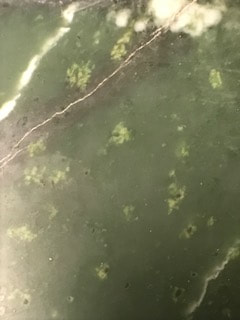
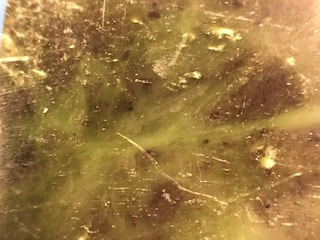
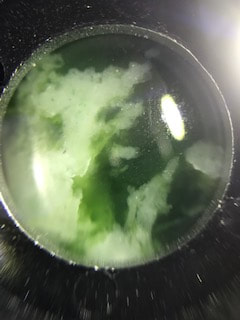
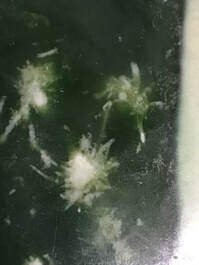
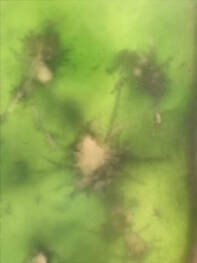
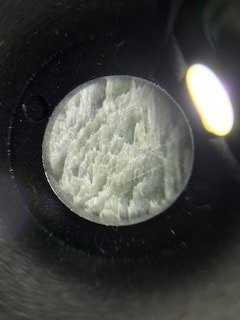
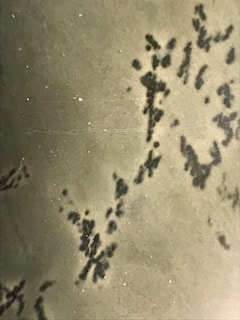
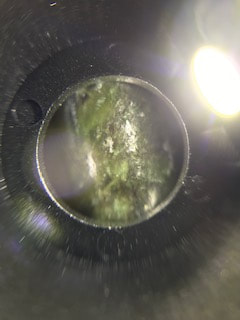
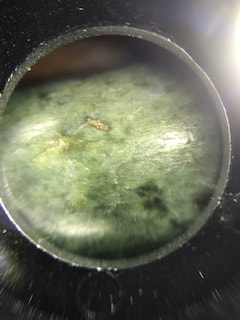
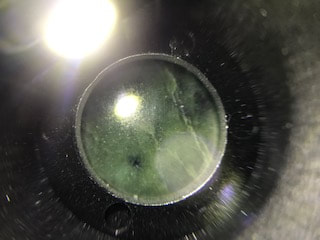
This month's blog is a bit of a cop-out as it is so easy. But I don't apologise for that - I want to show off some of the beautiful facets of nephrite. It's not always the highly translucent stone which grabs my attention. Nor is it the stone that takes the best polish. The beauty comes at different scales and times. First, just looking at the rough rock can show lots of interesting features and colours. Then when the rock is cut or slabbed it shows different aspects of beauty. And as I carve it, using finer and finer grades of grit, the features I may appreciate most are the imperfections - the odd crystals or veins, the little splashes of different colours, the texture and more. I could go on and on. But won't for a change! Below are a series of pictures, some taken with a 15x macro lens and others with a 30x phonescope attachment on my phone to give greater magnification. They show up many of the finer features I mention above.
I hope you've enjoyed the close look at a few pieces of nephrite and agree with me that the beauty is more than skin-deep! Each piece of stone rewards taking a handlens to it.
Enjoy! To produce rings, the easiest and most accurate method is to begin with a core bit which is just a mm or two smaller than the required inside diameter of the ring. You core out the centre/hole and then remove the ring from the piece of stone, either with another core bit a couple of mm over the finished size you want, or with your trim blade.
After that you grind out the inside to close to the final diameter, using your Vernier Caliper to make sure you don’t go too far, and then grind down the outside so the ring is neither too thick nor too thin. The only way to define what is the right thickness is experience, aka trial and error – too thick and they are uncomfortable to wear and too thin and they will break easily. When grinding out the inside of a ring, near enough isn’t good enough. The required internal diameter was 20.68 mm and a steel rule just doesn’t cut the mustard. I used my Vernier Caliper, which is accurate to 0.2 mm to measure the hole in many directions.
But how to grind out the centre hole to such an exact size? Having thought of using mini-expanding drums with spiral diamond bands, and discarded the idea because they were too coarse, and diamond files because they would be too inaccurate (the hole needs to be as close to circular as possible), I finally decided on using a ½” sanding mandrel which had a slit in it for the end of the paper. This was mounted in my point carver chuck.
I decided on 600 grit Wet & Dry (W&D) paper which would give me a slow grind as I rotated the rings across the paper. And of course there was a slow drip of water on the work to stop it getting hot. I had to do some additional filing to remove the harder spots in the rock, then went up through the finer grades of W&D until it was polished. They came up well.
The sanding mandrels can easily be overlooked when carving but they certainly pull their weight at times like this!
|
AuthorOn this page I intend to add monthly updates on aspects of jade carving. I also plan to invite more experienced carvers to offer a "master-class" on a particular subject of their choice. With this I hope to enthuse both the novice and the expert in this ancient and beautiful art-form/craft. And comments are welcome! Archives
March 2024
Categories |


 RSS Feed